Saturday, September 12, 2009

Frame-tastic Seat Magic

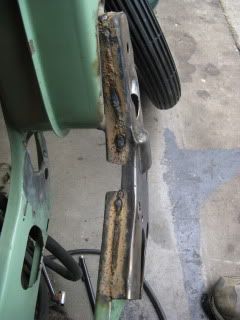
So the seat setup I was running has been failing...miserably. There wasn't really any true support; it was just a hack job mounted to the seat post (on the frame) with some nuts and bolts. While this worked for a while, the seat started to bend the frame due to pressure. when I took the seat off to fix this problem further I discovered this.


Too much stress on the frame...cracks! Thankfully Nate Bandit came to the rescue with a great idea.


First we had to kill this ginormous spider lurking outside the garage.

Seriously it was HUGE. Biggest spider I've ever seen in the U.S. outside of a zoo or pet shop. I know the picture is blurry, but I didn't want to get any closer than this. Apparently its harmless, but still scary.


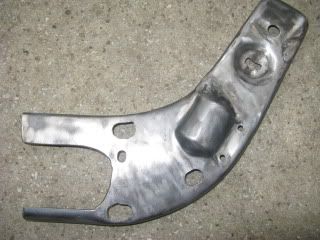
Next we had to harvest a new tab from an old seat post.

I cut this one off and Nate welded it to the frame to mount in the existing holes on the seat pan.


(I love how this photo came out)


Lastly Nate rigged up a mono-shock from a pocketbike(I think?) to my seat pan...


...with the other end mounted to a steal plate welded to reinforce the cracked frame, I now have a much more reliable and smooth ride.

Monday, August 24, 2009

Back to the Future

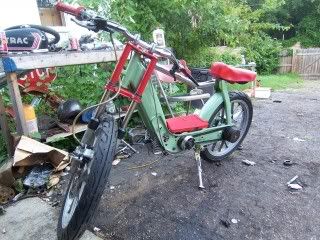
So I'm way behind in posting updates on the ciao...

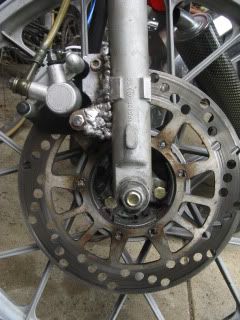
1. Disc Brake failure...again. I was running the bike up and down the alley tuning the carb. On my last trip of the night I let her rip, but when i went to hit the brake...POP! The aluminum tab I was using on the forks broke off, leaving the caliper to hang and ping back and forth on the snowflakes. Thankfully I was wearing decent shoes and had a bit of room to stop myself. I meant to add a bridge and knew the tab was not a complete fix...but I pushed it too hard.

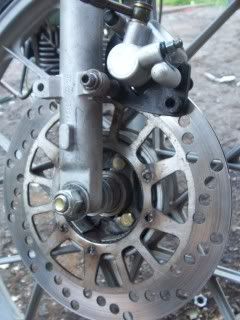
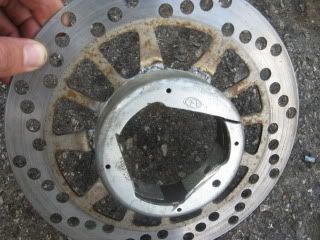
2. So once again I had to David Bowie the disc brakes (cha cha changes). Some stock alluminum, some dremel work, and Nate Bandit's allumium welder and whalla! We have a better braced, better placed, and more ugly disc brake setup.


3. Ghost Ride! Was able to take the ciao for it's first rally debut.

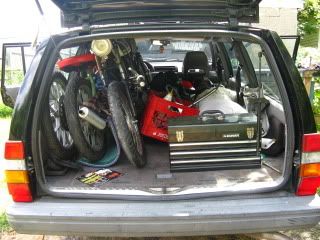
Loaded up the bikes in the volvo and headed for Grand Rapids. The rally was awesome! It felt like more of a vacation than a rally. Sara Mier was an AMAZING!!! host. For some reason everywhere we were housed that weekend was a pool and a hot tub. The rally was super chill and I had a great time getting to know some more TBS members as well as chill with Ghost Riders, Guns and a few gen forum favs. While my rigid ciao didn't like the absolutely terrible Michigan roads, (it was like riding a bucking bronco)...


...the ciao wasn't running as fast as it should. I need to continue on working on the carb tuning. PHBG is new to me. I also noticed that it shreds belts. I'll need to keep some spares or drop some cash on something super strong. The belt's also not variating out the entire way so I'll have to tinker with the weights. Either way I was loving it. I'm not as comfortable with fast bikes yet, so I'll blast to comfort for now.

Wednesday, August 12, 2009

Disc Brakes pt. 2: The Final Frontier

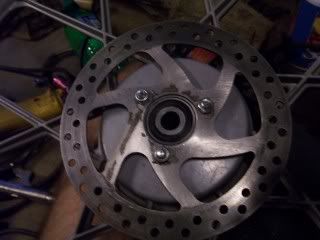
The final stages of my disc brake setup...I meant to take photos of the process, however for some reason I forgot. So this is what I have.

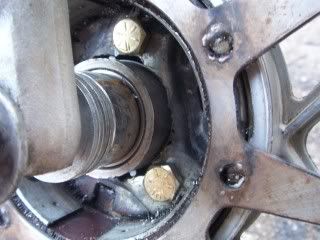
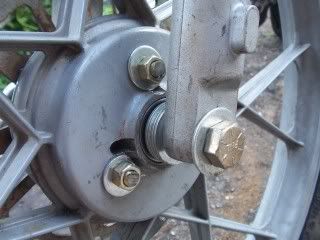
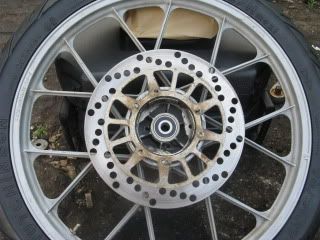
I used a hobbit variator plate to work as a brace. I had to use a dremel to widen the hole in the middle of the plate so that it would fit around the inner axel.


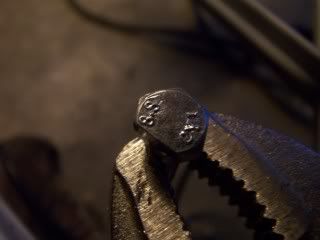
I then drilled 3 holes in the plate and 3 holes in the opposite side of the wheel. Then I bolted it all together nice and snug. Thus holds the disc on the wheel.

NOTE: Drilling holes in the super duper hard metal that makes up the hobbit variator plate was VERY unsuccessful at first. We went through many drill bits; crappy bargain supply ones first and then nicer ones. I had to go out and buy another set.


Thankfully mounting the calipers wasn't too difficult. There was an extra set off of a chinese scooter in a box that Ryan Nichols had in the garage that fit nicely. In order to get it to mount I had to turn the forks inside out for spacial reasons. Then thankfully there were already tabs on the forks that lined right up with the calipers. MOPED LUCK! One bolt, a spacer and a few washers later and it was ready to go...After going through the whole brake fluid bleeding process.


Things are coming along nicely.

Tuesday, July 21, 2009

Disc Brakes pt. 0.5

So while I'm finishing up with "pt. 2" I thought I'd Pulp Fiction this particular project for a second to let you know what DIDN'T work the first time around. In my first attempt I tried to simply mount a disc directly to the wheel hub itself.


I had to grind down the hardware to fit snugly inside the hub so that I could bolt it down.


This however did not work because the outside of the hub is curved rather than flat; making spacing just about impossible. The disc would bend at different points making it uneven (which would not work for the calipers). Sorry no pictures of this.

So that's the reason for going with the ridiculous "pt.1" method shown below.

*Side note: The 100cc Simo engine does not have a lighting coil. Rufus runs a battery for his lights. Since there is now a rotating flywheel in my front wheel hub the Bandits are going to help rig a system so that I'll be able to get function (rather than just mounting method) out of the flywheel.

You know...something like a coil mounted to the forks so that it will run a LED headlight...it's going to be awesome. The only downfall will be that the front wheel will have to be spinning for me to have lights...but that's nothing an extra little battery couldn't help with.

Monday, July 6, 2009

Disc Brakes pt. 1

What's going on here?


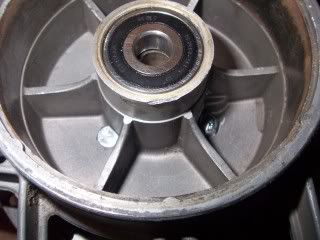
That's a puch flywheel with the middle cut out welded to a disc brake so that it will fit in my front vespa wheel hub. Crazy. Yes. But it fits!


...And it looks sooo nice. Perfect clearance for the snowflakes.


next step securing the the new disc brake using a hobbit variator plate and some nuts and bolts(you have to use what you got), then mounting the caliper!

Monday, May 18, 2009

It's Business Time...

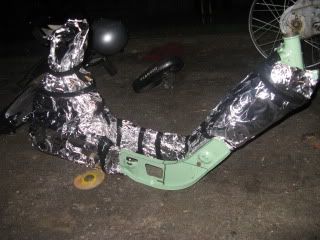
In an effort to save my already powder coated frame (purchased that way) I wrapped the frame in tinfoil to help prevent as much "pocking" as possible. Since welding involves molten metal it often leaves "Pock marks," little extra bits of molten metal that spark out and bind to areas you don't intend.


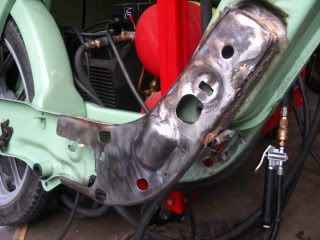
Frame Modification phase two: Welding. So I got some help from fellow bandits to help up the newly prepared piece. Here it is welded up nicely.


Then we cut inside frame out to create the pocket for the simo engine's large fins. Since it doesn't have fans on the flywheel it needs these large fins to cool the engine instead. While a lot of people cut them off to get them to fit, most then have cooling issues. I wanted to preserve these as best I could.


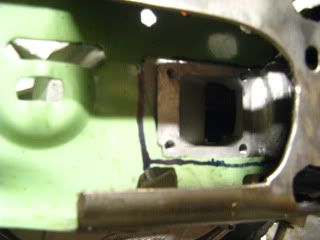
After mounting the engine it took a series of measuring, marking and cutting to get to fit just right. Here you can see that I had to cut further material to allow for the side intake to be mounted post engine mounting.


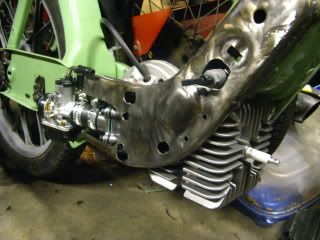
Here's the complete mount with engine, side intake and carb.

Monday, May 11, 2009

Frame Modification

Thus begins the odyssey. After some measuring and talking with some Bandits it looks like I've come up with a solution to my engine fitting problem. I need to expand one side of the frame, without loosing structural integrity.

I need a piece to extent the frame. This was harvested from a junk ciao frame thanks to Gabe (Shout Out!)

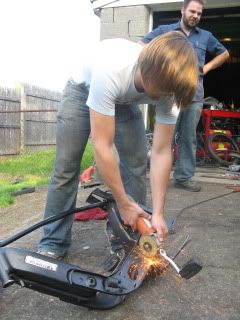
I cut the opposite frame side off from the gas tank down about half way.


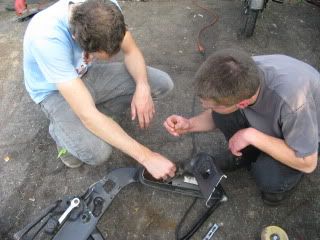
Zack and Gabe explore the caverns of a rusty carcass.


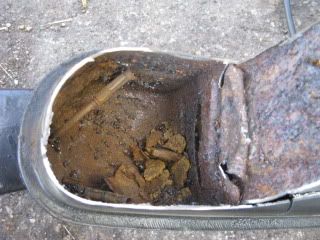
Aerial view of the excavation site...Are those hieroglyphics and a petcock sarcophagus?


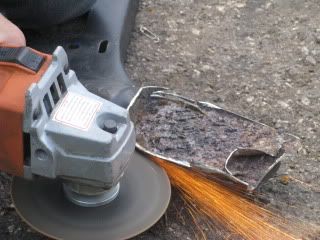
I then trimmed off the remaining metal that composed the gas tank. This will be in the way.


After some cutting and grinding the piece is now ready to be welded to the frame...


Coming up next time...
BUT WAIT! ISN'T IT ALREADY POWDER COATED!?!?